
APN
These three letters and the right APN are all you need to know to configure data for your SIM card in your device.
All operators use a specific APN (= Access Point Name). This is often pre-configured for your SIM card, but must be adjusted sometimes manually for your device.
For this you should know how to access the configuration menu on your device. If you don’t know, you should look at your manual or on the internet for a description. The appropriate APN of all shown providers is given at the end of every provider's section in this Wiki. In some cases username and password need to be adjusted too, all other fields can be left blank.
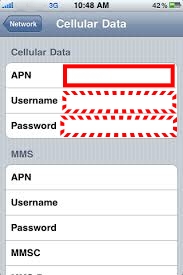
APN configuration on iOS ios devices
iOS apn
On all iOS devices of Apple like the iPhone you need to choose Network on your General menu first. Then click on "Cellular Data Network" and the advanced adjustments. The APN must be filled in the Cellular Data APN field. Be careful, because it needs to be 100% accurate. On some networks also Username and Password need to be added too.
To edit the settings, tap each field and enter the details provided. The settings should save automatically. Depending on your carrier, you may not be able to edit the cellular data settings. If your carrier needs a different APN setting, you may be able to use a configuration profile with the correct setting. This is explained here.
Unless you're using a configuration profile, an update of iOS resets any modifications made to the your APN settings. If you edited your APN settings before updating iOS, these settings will reset to the default values. So you may need to re-apply your settings after an iOS update.
To revert to your carrier's default APN information, tap Reset Settings on your iPhone. If you installed a configuration profile, the profile's default information will be used instead.
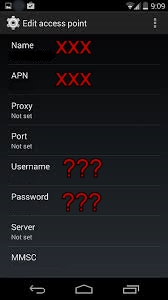
APN configuration on Android devices
Android 2-4
As there are a few different versions of Android on the market, it's not so easy to generalize the basic steps required to get you up and running with the internet. Once you have inserted the SIM into your device simply follow this procedure:
On Android 2 and 3: Menu or Applications > Settings > Wireless and Networks > Mobile Networks > Access Point Names
On Android 4: Menu > Settings > Mobile Networks (this is often hidden behind "more" in the Wireless and Networks folder) > Access Point Names. On some devices like Samsung you have to click: .... Mobile Networks > Mobile Data > Access Point Names.

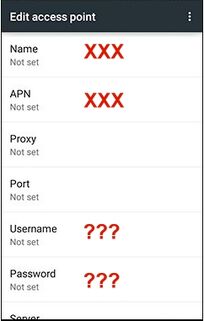
Android 5-7
On Android 5, 6 and 7: It's essentially the same path like for Android 4, but the colour scheme has been inversed and looks much more like on iOS devices now.
You should end up with one screen like on the pic left or above. Then click Menu, tap "New APN" or on the (+) icon and tap "Name". For name you can give any name you can think of, but it will be most useful a name associated with this SIM card. Then tap "APN" and enter the APN 100% correct. Ensure that Proxy, Port and Server is not set. If you need to enter a Username and Password, tap the words and enter. APN Type should be default or internet, Authentification Type PNP, the APN protocol IPv4 and the Enable box should be ticked. Then press the Menu button, tap SAVE and press the Back button. Then you see the given name of your APN which should be tapped to enable. Finally, press Home and turn on mobile network and data (if it hasn't started automatically).
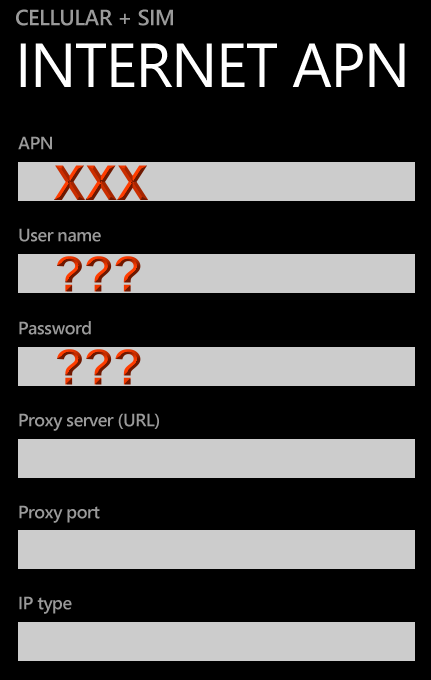
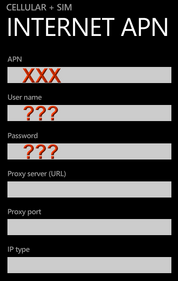
APN configuration on Windows Phone devices
Tap Settings > Cellular & SIM > SIM settings > Add Internet APN. Tap APN and fill in the name, if required Username and Password too. Finally tap SAVE to store.
APN configuration on other devices
Check the manual for more information. Often the settings are hidden in the software menu of modems.